

We have made big changes in the master bathroom since we moved in. For example, we replaced the old fiberglass shower with a tiled floor to ceiling shower.

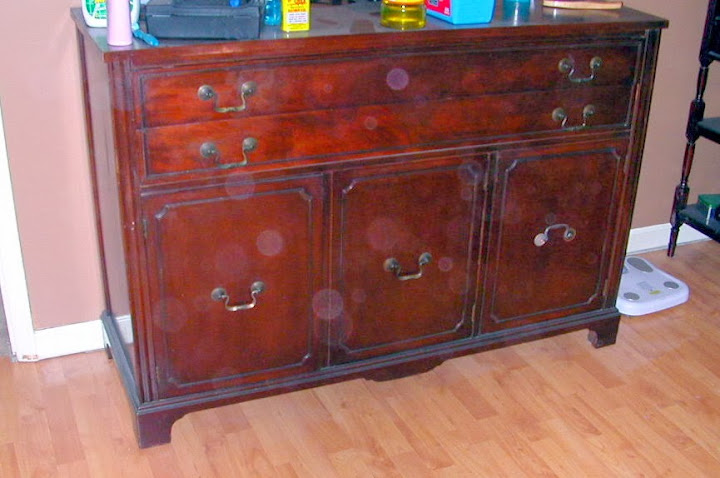
We replaced the original 1980s vanity with a vanity we made ourselves from an old antique dresser. The mister was a big part of the ‘we’ when it comes to the vanity construction.

We had 20 x 20 travertine tile installed to replace the carpet, yes the carpet, that was there. Who wants carpet in a bathroom?!

master bath:
paint trim
hang shade
update art & rug
fix baseboards
fix vanity
new light fixtures
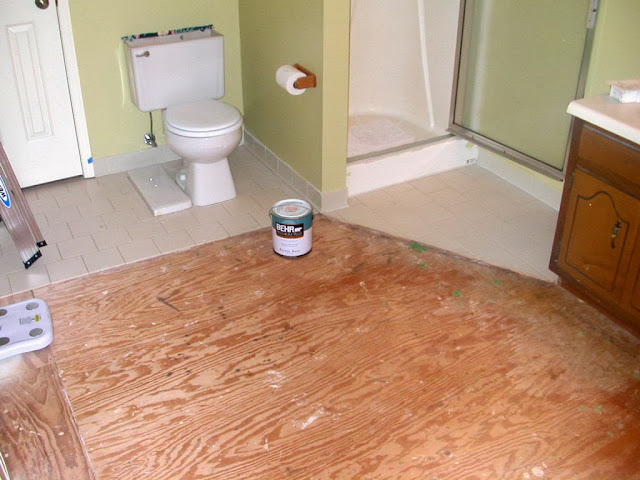
I started with painting the trim. Painting is one of my favorite things to DIY. I really kind of like it. It’s peaceful and you can see a big transformation in a relatively short amount of time. I appreciate instant gratification. BUT, I’d rather paint the walls than just the trim. Painting trim is no bueno. I knocked it out though: two coats of Behr’s Ultra White in a semi gloss finish on the two doors, two windows, and baseboards. I must mention that the trim in my entire house (except for the living room’s stained trim) is cream. Not white. Cream. You can see what I mean in this picture taken while putting on the first coat.

That small change to bright white really pops and makes difference. Of course, that light fixture was not doing anyone any favors.

It took a few years, but I finally finished this room off with a fresh coat of paint and updated light fixtures. See all the updates and new pictures HERE.
-J

I do the trim and everything for a room at the same time. I see the ugly yellowed trim in the other rooms, but it doesn’t hang over my head because I haven’t worked in those rooms yet. I had to create a list too!
what a transformation! The bathroom looks great… LOVE the vanity!
My shower is very similar to your before! Did you have a pre-formed shower pan originally? How did you redo the floor for the tile? Thanks!
Yes, it was a completely preformed fiberglass shower before. We ripped the entire thing out and built a shower pan with floor mix cement and liner.
Alyssa, this may help. http://www.tileshop.com/diy/pdf/how-to/showerbase_install.pdf
In your finished shower do you have a door?
Nope
Would you be able to post more details about how you changed your shower? This is a project I definitely want to tackle on the cheap since we’re not in our “forever” home but I haven’t been able to find much info.
Thank you!!
I would love to but I’m afraid the details may be lost as this was done several years ago. We bought all supplies and hired a tiler, it still turned out to be very inexpensive (we had 3 bathrooms tiled at the same time). These steps are the basics he followed: http://www.diynetwork.com/how-to/skills-and-know-how/plumbing/how-to-tile-a-shower
Thanks for the quick reply. I was hoping more for how you removed the fiberglass surround and what materials you bought, but I understand if this was just too long ago.
Ah! We removed the fiberglass shower using a saw and just cut it out of the wall. We removed all sheetrock left over in the shower area and replaced it with cement backerboard. So that’s the foundation that was tiled over. I hope that helps!
Interesting..I wouldn’t have guessed a saw. I figured there are some screws I hadn’t noticed or something. We are in a manufactured home, so I’m not sure I could replace it with something as heavy as cement backerboard and tile, but I’m looking into it. I’m pretty sure we have the exact surround as your before picture and it always feels like it’s closing in on me.
Thanks for your input!