

I’m SO excited to be here crashing Jae’s blog for the day (and celebrating her 200th post)! Can we all just agree that the girl’s got some amazing style? GAH. So fabulous.
Hey there! I’m Kelly… I’m the one in the pic who’s not a man or a small child.

I blog over at View Along the Way about our adventures – and misadventures – as we fix up our stinky ol’ foreclosure on a teeny tiny budget.

We’ve been at it for four years now, so I thought I’d share some of the projects we’ve taken on that have had the biggest impact for the buck.
1. Removing Popcorn Ceilings
Okay friends. I had NO IDEA how much light popcorn ceilings suck out of a room until we took down our popcorn ceilings.
Check out this side-by-side comparison of a small closet before and after we removed the popcorn texture. These photos were taken with the exact same camera settings. Look how much lighter and fresher the one is on the right! Crazy, right?

The good news is that it’s SO SUPER easy and virtually free to remove popcorn ceilings, although it’s about as messy a project as you can take on. Here’s how we removed our popcorn ceilings.
2. Paint
I mean, obviously, right? And since everyone loves a before-and-after – it’s not just me, is it? – here’s our baby girl’s nursery before we bought our house and today:


…Ahhh, that’s better. Of course, we did a little more than paint in that room. We also installed front-facing bookshelves, installed DIY crown molding, built a closet organizing system, and added a whimsical pinwheel art installation over the changing table.
But what would all that be without the happy new paint color?
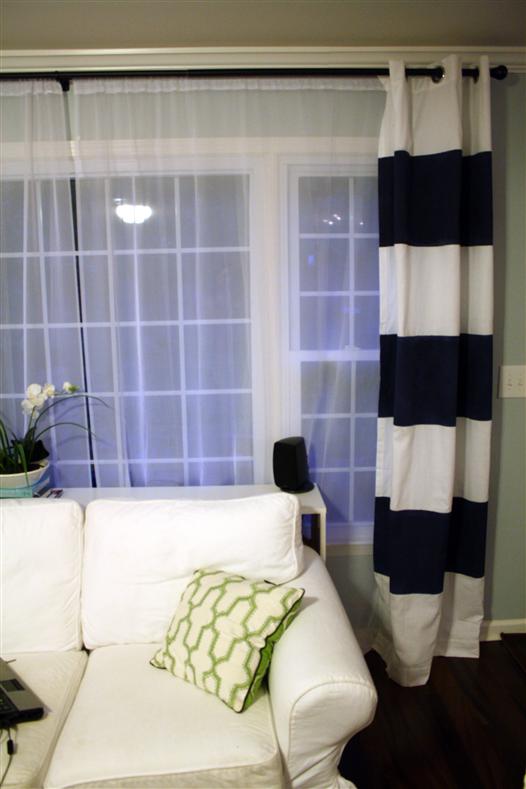
3. Window Treatments
Whoa, hold on there. I am not talking about expensive, custom drapes that run in the thousands of dollars. (That’s so, SO far outside my budget.) DIY window treatments make such a huge impact in a room and can look custom for tiny percentage of the price.
And they make a crazy difference both in the form and the function of a room. Here’s my master bedroom before:

…and after adding DIY lined back-tab curtain panels:

(Instructions to sew your own lined back-tab curtains here.)
I’ve also tried painting store-bought curtains. (See how I did that here.)
Or, like Jae did, you could just hem store-bought curtains for a custom look on the cheap.
We still have a long way to go and many, many more projects to tackle, but so far, those are the biggest-bang-for-the-buck projects we’ve taken on. I’d love to hear what’s worked well for you too!
I hope you’ll join me over at View Along the Way and follow along as we post about our latest adventures. You can subscribe to the blog, or follow me on facebook or twitter.
Thanks so much, Jae!
I LOVE your featured curtains – so fabulous! Thank you very much Kelly for dropping by. Your big impacts are great ideas to keep in mind.
-J
Kelly is a DIY diva and I love her curtains! I desperately need some – but can’t sew a stitch!
Kelly
Great job. Popcorn belongs in a bowl…with salt..lol. Great job. I’m going to borrow the closet design too. Kudos.
Kelly is a friggin’ GENIUS. I love how expensive a look she gets on a tight budget – speaking my language right there! Fab 🙂 x
Thanks so much for letting me hang out on your blog yesterday and congrats again on 200 posts!!
Um, whoa, I had NO idea about the light and popcorn ceilings. I thought everyone removed them since they just didn’t like the look. This has been enlightening (no pun intended). Thanks!