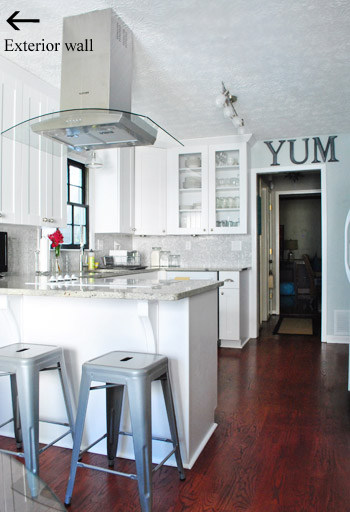
All of this time, our lovely range hood has been just that: lovely decoration. While it recirculated air through a filter, it didn’t actually do any more than that because it wasn’t vented to the outside.
I had learned to adjust my cooking habits to compensate for it though i.e. opening the window over the sink and using a pot cover whenever possible. A few months back, we finally fixed the situation and now the range hood sucks those cooking odors directly to the outdoors.
Here’s how it went down.
If you’re not going to do this job yourself, who do you even call to vent a range hood? That was my first question. After asking around, I found out that HVAC professionals (heating & air conditioning) are the ones to call to do this job.
I initially thought it would be easy to just run the duct work over to the nearest exterior wall.
Because of the direction the joists in the ceiling run in, we weren’t able to go that route. The guys consulted TJI floor joist codes, guidelines that specify where joists are allowed to be cut to maintain structural integrity. We ended up having to go in a different direction so that the duct work went outside over the window above the sink.
Once that direction was decided, they got to work drilling out a hole for the vent placement on the exterior wall.
They ran the foil duct from the outside hole through the ceiling to the location of the range hood and had to secure the hood back in place.
Here’s how the vent outside looks on the exterior wall.
This is how the ceiling looked when the HVAC guys finished reconnecting the hood and the vent was working perfectly. This part took about 2 hours and they charged $200.
You can see we were left with gaping holes in our kitchen ceiling. The drywall finisher came two days later. He cut new pieces of drywall and installed them. For the drywall mud, he used a quick drying material that allowed the texture to be applied within 30 minutes of installing the sheetrock.
He used a special tool on the end of a long pole to recreate the textured ceiling. [The textured ceiling is not my favorite – but unfortunately it’s not going to be changing soon]
The whole ceiling repair took about an hour and a half and cost $125. Now, all that’s left to do is a fresh coat of paint for the newly repaired ceiling.
The painter (that’s me!) should really get on that now.
-J
To see more details on the range hood and the kitchen remodel see this post and this post.


WOW…..WOW…..WOW
I can’t find any other word…..
Who knew all that was required for ventilation LOL. You can now make blacken shrimp w/o major incident. Cool….
LOL! Yes, ma’am!
I’m so glad you shared this! Our stove is in the exact same spot as yours and has no vent whatsoever. It orginally had a vent between the burners that pulled air downward, but that is broken so we will have to install a range hood at some point. Glad to have this info!
So glad it was helpful!